Would you like to switch to a different hosting company or server for your WordPress site? Data loss and downtime are the two biggest risks associated with switching web hosts or migrate WordPress to a new server. Let's talk about how to migrate WordPress website to OneHost BD.
You can lose sales and search engine rankings if either of these events makes your website temporarily unavailable for users and search engines.
The steps required to move your WordPress site are pretty straightforward, but before we start demonstrating how you can migrate WordPress site, please remember that many WordPress hosts will move your site for free.
If you have just signed up for a new hosting plan and are considering moving your site, please contact your new host to find out if they will do the move for you.
Backing up your entire site is the first thing you should do before migrate WordPress. It’s a smart practice to perform this as part of your WordPress security before making any major changes.
The migration of your WordPress installation is also required because so much data is to be moved.
What do you do to backup your site?
There are a lot of WordPress plugins that can backup your site for you.
Backup plugins typically let you choose which files get backed up, how often your backups are made, and where they are stored. WPvivid is one of the best plugins you can use.
In addition to scheduling backups, restoring points, limiting files, filtering large files, splitting backups, utilizing backup themes and plugins, and supporting remote storage, this plugin offers a wide range of powerful backup features.
If you prefer, you can also use the manual method. The steps are given below-
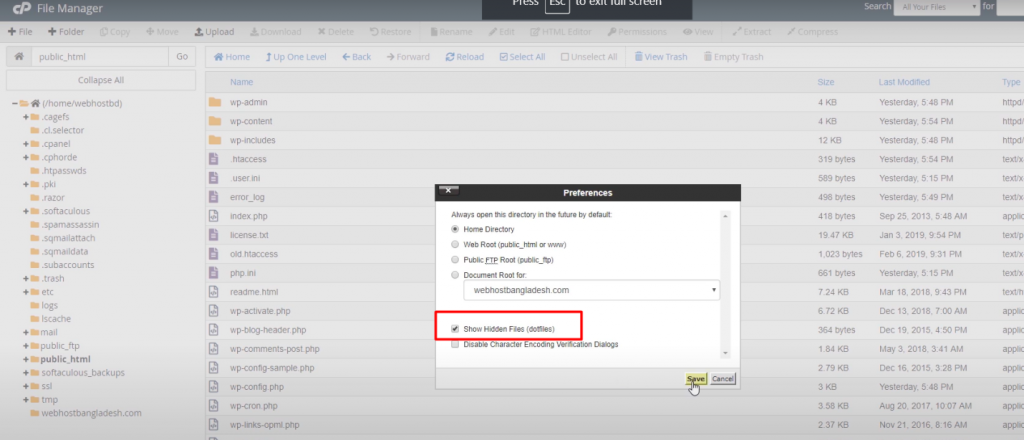
1. After logging in go to the file manager option and click on the public_html options.

2. From the top bar, click on the Settings menu, click on the Show Hidden Files check box, and save the button.
3. This time we will compress the soft files and download them as zip files. Click on the select all button from the top bar menu and then click on the Compress button. Now will select the zip archive option from the compress button and click on the compressed file. When the files are compressed, click on the ok button.

4. Now we will see the wp-admin.zip file. Just download it from the top bar menu.

Now that you have a copy of your website’s files, you can create a new one. Its database needs to be backed up now.
In this section, you’ll find all the information about your site’s content, users, and much more.
You will need to access your database in order to do this. Most hosts let you access the database through the control panel.
There are only a few steps involved in exporting your database. The steps are given below-
1. Log into your web server’s cPanel account and open the phpMyAdmin program. Click the Export tab in the navigation menu to export the database that contains your WordPress installation.

2. We can export SQL data in the default settings of a Quick export and with the default settings for Quick export. When you click Go, a file will be downloaded and the database export process will begin.

We can now proceed to the next step.
Once you have prepared the new database login to your new web host.
1. First, go to file manager from the file section. Click on the public_html directory.
2. Upload the backup zip file by clicking on the upload button from the top bar menu.

3. After completing the upload back to the file manager tab. Now we have to unzip the file. Select the file and click on the extract button from the top bar menu.

4. Select the unnecessary zip file and delete it by clicking on the delete button.

Now we have to create a new database.
1. Now go back to the main cPanel dashboard and click on the MYSQL database option.
2. We can create a new database from here. After creating a name we will see the name by a success message. Copy the name and keep it another. We will see the name under the current database option.

3. Now, we have to create a user for this database. If you create a database, you have to create a user for that database. At the same time, you have to connect the database and the user. To create a database user scroll down and go to the MySQL user section. From here create a new user database. Use the password generator to secure everything. Note the password.

4. After that click on create user button. After creating this we will see the name by a success message. Again copy the name and note it. After that click on go back button.
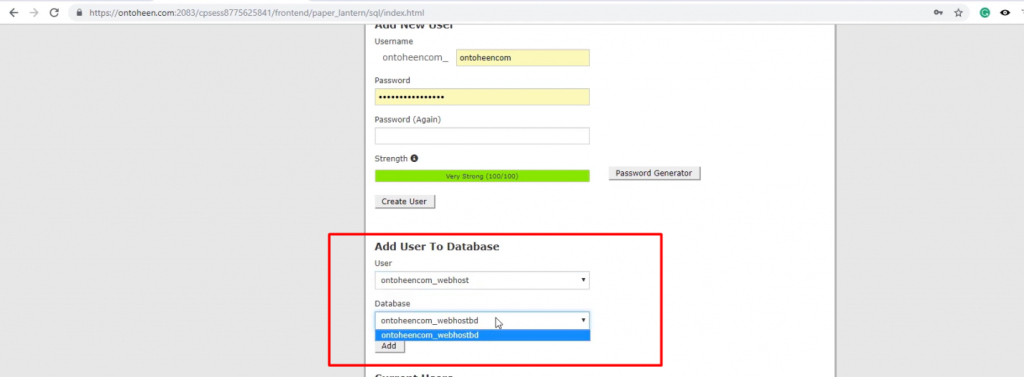
5. Now we need to connect the user to the database. For that scroll down and go to the “add a user to database” option.
6. Select the database and user from the box. Then click the add button.
7. Click the ALL PRIVILEGES button & scroll down and click the make changes button.

After creating the database click on the Home page button from the top of the menu bar.
1. To import a new database click on phpMyadmin.
2. Select the new database that we created. Click on the import button from the top bar.
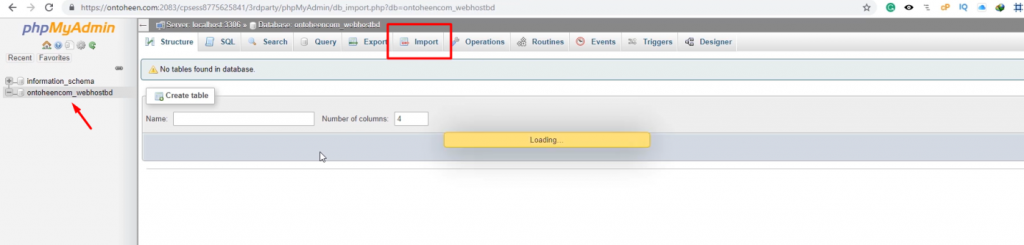
3. Click on the choose file button, select the downloaded database file and click on the open button. Click on the go button at the end. We will see the confirmation message.
4. In the next step, we will connect the database with WordPress. For this go back to the cPanel file manager tab. Select “Wp-config.php” file and click on the edit button from the top bar menu. Again click on the edit button.

5. While creating the new database, we took note of the database name, database user & database password. Update them from “DB_NAME, DB_USER, & DB_PASSWORD” option with that information.

6. Next click on the save changes button from the top bar menu.

After all, log in to the domain control area and update the name of the new hosting with the name server instead of the old name server. It normally takes 1-2 hours to highest 24 hours to change it. That’s all to change a WordPress site to a new host.
Taking the above process into simple steps to migrate WordPress website to OneHost BD, you can see that it’s not too complicated. The only thing you need to do is to be careful at each step and leave yourself the option to revert to the original version if a problem arises.
Did you migrate your WordPress website recently? If so, please share your experience.